Hardware
The Livegrid stack is intentionally modular so you can swap panels, sensors, and enclosures without reworking the entire device. The control electronics are published as open hardware; see the schematics and PCB notes inside the development section.
Prerequisites: Basic familiarity with ESP32 development boards and HUB75 LED panels makes it easier to follow along, but beginners can start with the quick checklist below.
Technical Specifications
- Controller: ESP32-S3 dual-core MCU with integrated Wi-Fi and Bluetooth.
- Displays: HUB75 RGB matrices (64×64 default) or recycled MBI5153-based modules via the alternate control board.
- Power: 5 V DC input over USB‑C or header.
- Sensors: Temperature, humidity, CO₂ (SCD41/SCD40 class), and ambient light.
- Expansion: I²C breakout header, fan connector, and spare GPIO pads on the backplane.
- Connectivity: Wi-Fi 2.4 GHz, optional Ethernet via USB-C dongles supported in firmware.
Assembly Highlights
- Mount the control board directly to the panel using the supplied standoffs.
- Connect the sensor/backplane board with the keyed ribbon cable.
- Feed 5 V into the USB‑C port or JST power header; the regulator handles up to 5 A.
- Route the touch buttons and speaker (if used) through the side headers.
- Close the enclosure and run a smoke test with the built-in demo mode.
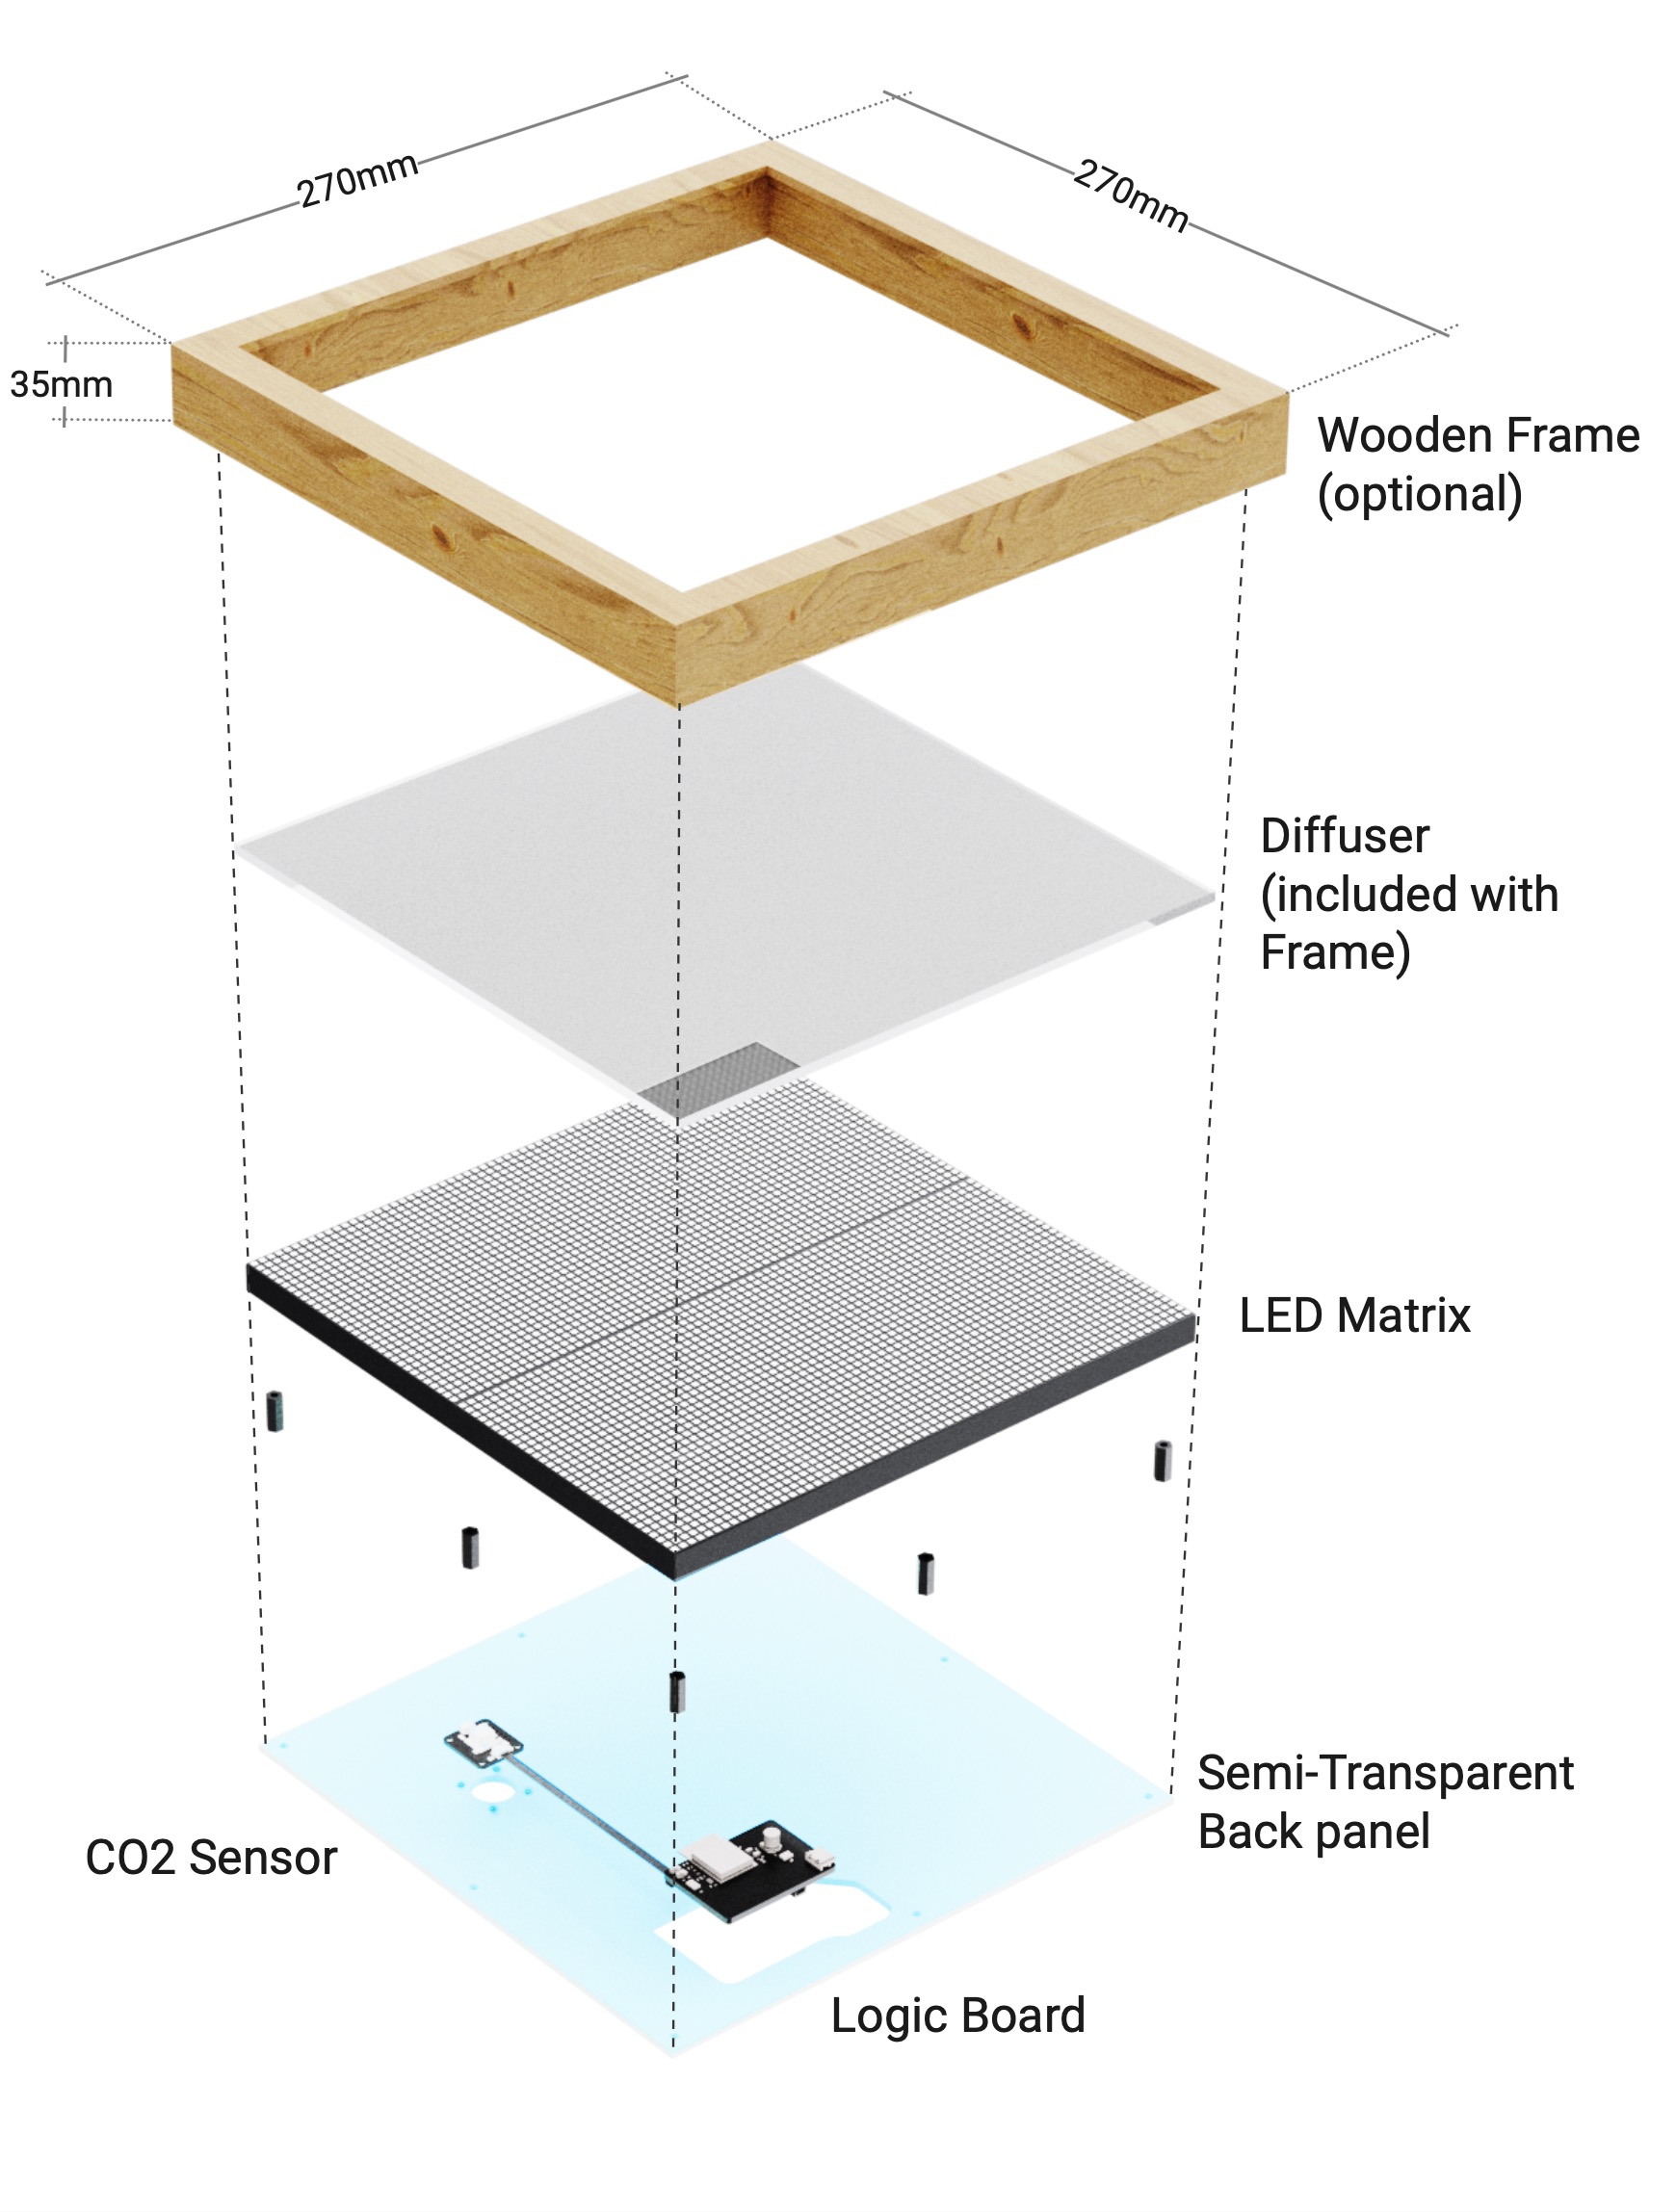
The exploded diagram above shows the default stack-up. For custom enclosures, export the DXF from the PCB projects to align mounting holes.
Common Use Cases
- Desk dashboards: Mount the panel in a picture frame enclosure and power it from USB.
- Wall-mounted sensors: Run a thin USB-C cable through the wall and surface-mount the panel flush.
- Installations: Daisy-chain multiple panels with PoE injectors and sync content using the UDP streaming mode.
Resources
- Development Guide: Firmware architecture, build instructions, and PCB downloads.
- eDMX: Control the panel from lighting consoles and media servers.
- MQTT & Home Assistant: Integrate with smart-home automations and dashboards.